Showing posts with label Brownies and Bars. Show all posts

Tuesday, September 1, 2015

Truffle Brownies


I guess I disappeared again....sorry it's been so long!  I graduated from college in May, moved and had a couple of vacations, so I've not been able to really focus on the blog.  I'm hoping all of that will change and I can get my creative juices flowing again!

I was asked by a client to make something fun for an event and I knew the guest of honor at that event loves chocolate....enter Truffle Brownies.  I'm not quite sure what I was expecting since I already make the best brownies in the world (triple chocolate espresso brownies) but these far surpassed my expectations.  I assume the guests at the party agreed since the brownies disappeared after dinner.  Also, there were comments that these were the best brownies ever and that they are not like any other brownie....and they aren't.  They are rich and creamy and sinful!  

Gotta give props to Bon Appetit for this awesome recipe.  I didn't add the nuts but did add chocolate chips to the batter before baking.  With that exception, I followed the recipe exactly.  I will tell you that the key to these brownies is in the quality of the chocolate.  I used a pretty good bittersweet chocolate for both the brownie and the ganache and I think it makes all the difference!


Truffle Brownies via Bon Appetit 

Ingredients:

Nonstick vegetable oil spray
12 ounces bittersweet chocolate, chopped, divide (half for melting, half for ganache)
11 tablespoons butter, cut into 1-inch cubes
1 1/4 cups sugar
3 large eggs
1 1/2 teaspoons vanilla extract
1/4 teaspoon salt
1 cup unbleached all purpose flour
1 cup dark chocolate chips (to add to batter)
3/4 cup heavy whipping cream

Preparation:

Position rack in center of oven and preheat to 350°F. Line 9x9x2-inch metal baking pan with foil, leaving overhang. Spray foil with nonstick vegetable oil spray. Combine 6 ounces bittersweet chocolate and butter in double boiler over simmering water and stir until chocolate and butter are melted and smooth. Remove from over water and cool chocolate mixture until lukewarm, 5 to 10 minutes.

Whisk sugar, eggs, vanilla extract, and salt in large bowl to blend. Whisk in chocolate mixture. Stir in flour, then add 1 cup dark chocolate chips. Transfer batter to prepared baking pan. Bake brownies until tester inserted into center comes out with moist crumbs attached, 26 to 28 minutes. Transfer pan to cooling rack and let brownies cool completely.

To make the ganache, bring cream to a simmer in small saucepan over medium heat and add the remaining 6 ounces chocolate and let stand 5 minutes to soften, then whisk until melted and smooth. Allow ganache to cool and thicken a bit before pouring over brownie in pan and spread to cover completely. Let stand at cool room temperature until topping is set, about 4 hours. DO AHEAD Can be made 1 day ahead. Cover and store at room temperature.

Using the foil as an aid, lift brownie sheet from pan. Fold down foil edges. Using large sharp knife, cut brownie sheet into 25 squares, wiping knife with hot moist cloth after each cut. Arrange brownies on platter and serve.

Tuesday, January 28, 2014

Dulce de Leche Brownies


My busy, busy, busy life is starting up again!  I am starting the second semester (of 4) in the Interpreter Preparation Program at Ohlone College in Fremont.  As if this isn't exciting enough, I also started working with my first mentor, the culinary arts instructor at California School for the Deaf in Fremont.  This semester is feeling a bit like a dream come true!  I LOVE school!  This is an intense program with a lot of hard work but the best, top-of-the-top professors and the best classmates I could ever ask for.  AND....I get to be mentored by a wonderfully kind and talented woman and work alongside of her with all of these talented and sweet kids.  These kids are fantastic....I can't imagine being as talented in the kitchen as they are at such young ages.

Needless to say....there will likely be a lot of quiet weeks coming from Baker Becky.  I really tried to pre-write some blog posts to save for later, but I ended up posting everything.  So I will just have to do my best and promise to try to get some great recipes out to all of you.  School, work, and raising two teenage boys....piece of cake! Ooooh...cake....


For now I will leave you with these delicious brownies with fabulous globs of dulce de leche waiting to surprise you with every bite you take!  Bake these brownies when you are in the mood for some serious rich gooeyness....I would tell you that they go great with red wine but, let's be honest....everything goes great with red wine!


Dulce de Leche Brownies David Lebowitz

8 tablespoons butter
6 ounces bittersweet or semisweet chocolate, finely chopped
1/4 cup unsweetened Dutch-process cocoa powder
3 large eggs
1 cup sugar
1 teaspoon vanilla extract
1 cup flour
1 cup Dulce de Leche

Preheat the oven to 350 degrees.  Line an 8-inch square pan with a sheet of aluminum foil that covers the bottom and reaches up the sides. Spray the bottom and sides of the foil with non-stick spray.

Melt the butter in a medium saucepan. Add the chocolate pieces and stir constantly over very low heat until the chocolate is melted. Remove from heat and whisk in the cocoa powder until smooth. Add in the eggs one at a time, then stir in the sugar, vanilla, then the flour.

Scrape half of the batter into the prepared pan.  Drop one-third of the Dulce de Leche, evenly spaced, over the brownie batter, then drag a knife through to swirl it slightly. Spread the remaining brownie batter over, then drop spoonfuls of the remaining Dulce de Leche in dollops over the top of the brownie batter. Use a knife to swirl the Dulce de Leche slightly.

Bake for 35 to 45 minutes. The brownies are done when the center feels just-slightly firm. Remove from the oven and cool completely.

Enjoy!

Recipe Shared On:
Wednesday's Adorned From Above Link Party
Hearth and Soul Blog Hop
Freedom Fridays
What'd You Do This Weekend
Treasure Box Tuesday

Monday, January 13, 2014

Salted Caramel Butter Bars


I pinned this recipe quite a while ago and then completely forgot to make them....I'm not sure how anyone could forget to make caramel bars....but I did.  Luckily I eventually remembered that I wanted to try them because these are sooooo goooooood!  Be warned....these are not diet bars.  There is a pound of butter in them but that is what makes them soooo goooood!  :)


The crust and top crumble are made from your basic shortbread recipe.  Lots of butter, sugar, flour and vanilla.  Super simple.


The caramel layer is made from melted caramel candies and cream.  Pretty much guaranteeing you will make them because they are so simple.  After I spread the caramel over the crust, I sprinkled some maldon salt over the top.  You can see the beautiful flakes in the picture above!  If you prefer your caramel layer to be unsalted, that is no problem.....it will still be delish!


Once the bars are baked and golden brown, let them cool completely before cutting.  The caramel is much easier to cut once it has cooled and hardened a bit.


Try to take some pictures before your children and their friends sneak into the kitchen to eat them all....not that I ever have that problem.....but man, those kids are quick!  


Salted Caramel Butter Bars adapted from Cookies & Cups

Crust:
1 lb. salted butter room temp
1 cup sugar
1½ cups powdered sugar
2 Tbs vanilla
4 cups all-purpose flour

Filling:
1 bag (14 oz.) caramel candies (about 50 individual caramels), unwrapped
⅓ cup milk or cream
½ teaspoon vanilla
1 T. coarse sea salt (optional)

To make the crust:

Preheat oven to 325°

In a large bowl, combine the butter and sugars. Using mixer on medium speed, beat together until creamy. Add the vanilla and beat until combined. Sift the flour into the butter mixture and beat on low speed until a smooth soft dough forms.

Spray a 9x13 inch baking pan lightly with non-stick cooking spray. Press one-third of the dough evenly into the pan to form a bottom crust. Wrap remaining dough in plastic wrap and chill in refrigerator.
Bake crust until firm and the edges are a pale golden brown approx 20 minutes. Transfer pan to a wire rack and let cool about 15 minutes.

While the bottom crust is baking and the remaining dough is chilling, make the caramel filling. Place the unwrapped caramels in a microwave-safe bowl. Add the cream. Microwave on high for 1 minute. Remove from the microwave and stir until smooth. If caramels are not completely melted, microwave on high for 30-second intervals, stirring after each interval, until smooth.  Once the caramel is melted add in your 1/2 tsp vanilla and stir until combined.

Pour the caramel filling over the crust. If you are going to salt the caramel sprinkle it on caramel layer now.
Remove the remaining chilled dough from the refrigerator and crumble it evenly over the caramel.
Return the pan to the oven and bake until the filling is bubbly and the crumbled shortbread topping is firm and lightly golden, about 25 - 30 minutes.

Let cool before cutting into squares.

Enjoy!

Recipe shared on:
Hearth & Soul Blog Hop
What'd You Do This Weekend
You're Gonna Love It Tuesday
Treasure Box Tuesday
Wednesday's Adorned From Above Link Party
Freedom Fridays
Strut Your Stuff Saturday Link Party

Monday, December 30, 2013

Raspberry Cheesecake Bars


There are not a lot of pictures of these beautiful cheesecake bars.  Not because they aren't beautiful but I was probably crying a little too much to take great pictures.  It turns out that crying makes things look blury and apparently blury pictures aren't super cool.  No, nothing is wrong.  These are happy tears...honest, they are.  No really....I'm not just saying it so that it will become true.

My oldest son is a senior in high school and it is college application time.  Actually, he has already applied early for a few colleges and the rest are going through now.  Six applications in all and only one in California....the rest are on the other side of the country.  Do you know how far away that is??  I don't either but it looks like it's pretty far.

I was super excited when we started this process and super proud that he wanted to apply to all of these awesome schools.  I kept encouraging him and telling him how proud I am of him.  Well.....now those colleges are starting to send letters.  He has already been accepted to two of them.  The first was Drexel University....um yep....the one in Pennsylvania (don't worry, I had to Google it too).....we live in California....that's kind of a long commute.  So anyways.....for all of you parents out there....don't be fooled by those darn college applications.  Yes, they seem all cool and fun and exciting...new adventures, growing up, becoming an independent adult, blah, blah, blah!  But really, they are a devious plan to move your kids halfway across the country and far away from you.

To help cheer myself up, I made these delish Raspberry Cheesecake Bars.  They are very pretty and would be the perfect dessert for a New Years Eve party, they are also super good for drowning your parental sorrows! (Eat two and follow with a glass of red wine)

Use any fruit filling or jam that you like....I am partial to raspberry!


p.s. I really am happy for my son.  He is ready to start off on a new adventure and I couldn't be more proud. Also, teenagers are known to have the occasional attitude that makes you think "huh, halfway across the country might not be so bad".


Raspberry Cheesecake Bars adapted from Kraft Recipes

1 cup  graham crack crumbs
3 Tbsp.  sugar
3 Tbsp.  butter, melted
5 pkg.  (8 oz. each) Cream Cheese, softened
1 cup  sugar
3 Tbsp.  flour
1 Tbsp.  vanilla
1 cup  Sour Cream
4  eggs
1/3 cup  raspberry jam (can use any jam, fruit filling, lemon curd, etc.)

Preheat oven to 325°F.

Line a 13x9-inch pan with foil, with ends of foil extending over sides. Mix graham crumbs, 3 Tbsp. sugar and butter; press onto bottom of pan. Bake 10 min.

In an electric mixer beat cream cheese, 1 cup sugar, flour and vanilla with mixer until well blended. Add sour cream; mix well. Add eggs, 1 at a time, mixing on low speed after each just until blended. Pour over crust. Gently drop small spoonfuls of jam over batter; swirl with knife. (I like to pipe the jam onto the batter in parallel lines and then cut through with knife....play around with it to create different patterns)

Bake 40 min. or until center is almost set. Cool completely. Refrigerate 4 hours. Use foil handles to lift cheesecake from pan before cutting to serve.

Store in refrigerator.

Recipe Shared On:
21st Century Housewife - Hearth and Soul Hop
My Turn For Us - Freedom Fridays
Keep Calm and Cook On - January
Strut Your Stuff Saturday Link Party
What'd You Do This Weekend
Treasure Box Tuesday
Foodie Friends Friday

Tuesday, April 9, 2013

Lemon Bars


I don't like to brag, but I'm a pretty good baker. Ok....fine....I'm an excellent baker!  Not everything I bake is perfect but I tend to be pretty successful more times than not.  I say all of this because I think you should know......lemon bars do not like me!


I absolutely LOVE lemon bars!  I especially love them when they are on the tart side and when the lemony custard is still creamy while the shortbread crust is flaky.  


Lemon bars are the perfect thing to make when your friends bring over bags of lemons from their trees.  They are yummy and pretty and classy and everyone loves them.  AND....everyone seems to be able to make them...except for me!


I'm sure I'm exaggerating a little too much, I mean....I've probably made them perfectly fine before.  But all I can remember is that the last three times I tried to make them, they didn't turn out.  One time, the crust wasn't done enough.  The next two times, I over baked the filling.  Everyone said they were good, but I wanted creamy perfection!


DONE!  This time, I tried Ina Garten's recipe.  Perfection!  I love that she pre bakes the crust a little bit before adding the filling.  Makes for a flakier crust.  Her recipe calls for a lot of sugar in the filling (3 cups) but I decreased it a bit (used 2 1/2 cups).  Feel free to modify the sugar in the custard to suit your taste.


This recipe is a keeper!  It probably helps that I watched that timer closely to make sure I didn't over bake them.  Success....look at that creamy custard!  I guess the lemon bars like me after all!  :)

Lemon Bars Via Ina Garten
makes 24 squares


For the crust:
1/2 pound butter, at room temperature
1/2 cup granulated sugar
2 cups flour
1/8 teaspoon kosher salt

For the filling:
6 extra-large eggs at room temperature
3 cups granulated sugar
2 tablespoons grated lemon zest (4 to 6 lemons)
1 cup freshly squeezed lemon juice
1 cup flour

Confectioners' sugar, for dusting

Directions:
Preheat the oven to 350 degrees F.

For the crust, cream the butter and sugar until light in the bowl of an electric mixer fitted with the paddle attachment. Combine the flour and salt and, with the mixer on low, add to the butter until just mixed. Dump the dough onto a well-floured board and gather into a ball. Flatten the dough with floured hands and press it into a 9 by 13 by 2-inch baking sheet, building up a 1/2-inch edge on all sides. Chill.

Bake the crust for 15 to 20 minutes, until very lightly browned. Let cool on a wire rack. Leave the oven on.

For the filling, whisk together the eggs, sugar, lemon zest, lemon juice, and flour. Pour over the crust and bake for 30 to 35 minutes, until the filling is set. Let cool to room temperature.

Cut into squares and dust with confectioners' sugar.

Recipe shared on:
Tumbleweed Contessa - What'd You Do This Weekend
Foodie Friends Friday
Esskunst Food Coaching - Cake Friday Coffee Klatch

Wednesday, March 27, 2013

Chocolate Turtle Brownies


Chocolate and caramel and pecans....oh my!  I like to call these my "pimped out" brownies.  Sure, chocolate brownies are yummy but why not add some caramel and pecans to push them over the top?  

I am having a "day" (a pretty rough day) and I need some chocolate...badly!  We are talking about one of those "stay in your jammies all day, lying on the couch eating cheese puffs" kind of days.  

Please don't tell anyone, most people think I'm pretty happy go lucky all the time and I hate to break the illusion (I basically hide my bad moods behind chocolate, red wine, and mashed potatoes).  I once had a grumpy woman accuse me of having butterflies flying out of my butt!  I'm not sure what that means....but I think it means I try to find the positive in life!  


So today I am going to try and focus on these beauties that I have created!  They are pretty darn yummy and not too hard on the eyes!  They are also super easy!  One might even say they are cheater brownies (yes...I used a box....I try not to do it often....but I'm human....and it was a super yummy, good brand).

This does not mean that you need to use a box....you can use your favorite recipe....or my favorite recipe from my blog!  My Triple Chocolate Espresso Brownies would be perfect for this recipe.  You could omit the espresso if you feel it would be too much (I do it all the time when I want to create a new brownie creation).


Basically I'm telling you.....make these brownies and maybe some mashed potatoes, open a bottle of wine and put in season one (through 10) of the "Friends" series, and wash your bad day away!!!!  That's what this crazy girl is gonna do!  :)

Chocolate Turtle Brownies

For the brownies:
1 box brownie mix (or your favorite brownie recipe)

Follow instructions on box to make the brownies.  Can pour the batter into a greased 9x9 inch pan or use your greased mini muffin tins, as I have done, to make little brownie turtle bites!  (actually I used my Demarle mini muffin tray that I got from my good friend Kim.....check out her page to order this fabulous non-stick tray....super cool).

Bake as per the instructions on box or until toothpick inserted into brownies comes out almost clean (I like mine a little fudgy).

For the turtle topping:
1/2 cup toasted pecan pieces, chopped
Sprinkle over cooled brownies

1/2 bag of caramels, wrappers removed
4 tablespoons cream
Microwave in 30 second increments, stirring in between, until melted.  Drizzle over top of brownies and pecans.

1/2 cup chocolate chip pieces or a really good dark chocolate bar, chopped (depending on your mood)
2 tablespoons cream
Microwave together for 30 seconds, stir and give it another 15-30 seconds if not completely melted.  Drizzle over the brownies.

Allow the chocolate to set....and....ENJOY!!!

(see....I told you it was easy)  :)    :)    :)

Recipe Shared On:


Monday, February 11, 2013

Angelic Brownies (shhh!... they are really Slutty Brownies)


It's celebration time!  Someone got an excellent report card this last quarter and showed great improvement! He worked hard to bring those grades up and we needed to celebrate his success!!!  When asked what he would like for a celebration dinner, he chose Pizza Spaghetti (recipe on the blog), and even searched the web for a recipe.  As for dessert, I thought we should try something new.  All over Pinterest these days I've seen these "Slutty Brownies" and I've been dying to try them!  So I tell both of my boys about them and they cringe at the name, both telling me it is too inappropriate.  Thus, the start of their campaign to rename these sinful brownies and Zack comes up with...... "Angelic".  He said it is ironic.  Did I mention how sarcastic my kids are?


This is the simplest dessert known to man!  Use a 9 x 13 or 9 x 9 inch dish, line with foil and spray with non stick spray.  The bottom layer is chocolate chip cookie dough (Max made my special recipe found here).


Next is a layer of oreo cookies (placed in perfect rows by Zack).  Next time I really want to try reeses cups instead of oreos (not a big fan of oreos myself), I think it would be to-die-for!!!!


Top it all off with a batch of brownie mix.  Can use boxed brownies or your favorite recipe.  We got lazy and used brownie mix and now I know, for a 9 x 13, you need two mixes if you want a thick brownie layer....which I do....I really really do want the thick gooey brownie layer!


Bake them until done, but still ooey gooey goodness!  Voila....Slutty....I mean Angelic Brownies!  Who am I kidding?  These brownies are waaaaay to sinful to be Angelic!  ;)

Slutty  Angelic Brownies 

Line with foil and spray with non-stick spray: a 9 x 9 inch baking dish (can use 9 x 13 if you double up on everything)

First Layer: Baker Becky's Chocolate Chip Cookie Dough here or use box mix or tube of dough

Second Layer: Oreo Cookies (or Reese's Peanut Butter Cups if you are brave)

Third and Top Layer: Brownie Mix or your favorite Brownie Recipe (double if you are using 9 x 13 dish)

Bake in 350 degree oven until toothpick inserted into center comes out clean or almost clean (if you like your brownies on the gooey side) about 30-40 minutes.

Let cool on a rack for about an hour before you lift out of pan and cut into squares.  If you want to enjoy them while still hot then just cut them right in the dish and serve them with a scoop of vanilla ice cream!

Recipe Shared On:
Wednesday's Adorned From Above Blog Hop
Chocolate, Chocolate and More - Thursday's Treasures
Foodie Friends Friday
Kathe with an E - You're Gonna Love it Tuesday

Monday, March 5, 2012

Lemon Cheesecake Creme Brulee Bars and an Earthquake!


Earthquake!  Monday mornings are difficult enough but all of us in the San Francisco area were awakened by a jolt at 5am this morning.  The earthquake was a 4.0 magnitude and nothing too serious but big enough to jolt us all awake and keep me from being able to fall back to sleep.  It will surely be a very looooong and sleepy Monday.

Since I'm awake I will share with you a yummy dessert I made this weekend.  I have been dying to try these Lemon Cheesecake Creme Brulee Bars ever since I first saw them on Lauren's Latest.  They looked sinful and delicious, two of my favorite qualities in a dessert.

I had  a lot of lemons just waiting to be used up so this recipe was perfect.  The base is super easy to make and the filling is the easiest cheesecake filling you can imagine.  Fabulous lemon flavor but certainly not overpowering and the sweetened condensed milk sweetens it and makes the filling so creamy but does not make the dessert overly sweet at all.  It is a no-fail recipe for sure.

My favorite part of the recipe was getting to use my kitchen torch!  I love to torch things!!!  These bars are fabulous as is and certainly do not need to be bruleed (is that a real word?) but I love how they look with their crackly tops once you burn the thin layer of sugar.  If you do not have a kitchen torch and really want this effect, just stick them under the broiler for a very short time and then pop them back in the refrigerator to keep the bars firm.

Delicious!!  Hope you all have a fabulous and earthquake-free day!


Lemon Cheesecake Creme Brulee Bars

1/2 cup softened butter
1/2 cup granulated sugar
1 cup all-purpose flour
1/2 teaspoon vanilla extract
8 oz. softened cream cheese
1-14 oz. can sweetened condensed milk
1 egg
2 tablespoons lemon zest
6 tablespoons lemon juice
5 tablespoons fine granulated sugar for brulee

Preheat oven to 350 degrees. Line an 8×8 glass dish with parchment paper and lightly spray with nonstick cooking spray. Set aside. In large bowl, combine butter, sugar, flour and vanilla until dough forms. Press evenly into the bottom of prepared dish. Set aside. In another bowl, whip cream cheese. Stir in sweetened condensed milk. Scrape sides and mix again. Pour in egg, lemon zest and juice. Mix until mixture starts to thicken, 20-30 seconds. Scrape sides and mix again briefly. Pour over the cookie bottom and smooth the top. Bake 20-25 minutes or until cheesecake is set completely. Cool, then refrigerate. Cut into 16 squares and separate. Sprinkle the tops of each square with 1 teaspoon of sugar and spread around with finger to evenly distribute sugar. Torch the tops until the sugar melts and turns an amber color. {If you don’t have a torch, place under the broiler}. Return squares to fridge until ready to serve.

Friday, March 2, 2012

Caramel Brownies


We are continuing with our "comfort Mommy" collection of desserts.  Apparently it is not enough for my son to get his Driving Permit, he also needs to learn how to drive!  Who knew?  Yesterday he had his first lesson with the driving school.  Yesterday....when it poured down rain here in sunny California!  Luckily the rain stopped long enough for him to get his two hours behind the wheel but it was still enough to cause this Mommy much worry and many more gray hairs.  His reaction to this new endeavor...."that was REALLY hard"!!

My reaction was to make anything that has chocolate in it!!  There is nothing like dark, rich chocolate and ooey, gooey caramel to calm the nerves and make you forget that your child who is too lazy to turn the lights off when he leaves a room is going to be driving a 4000 lb car that may need lights turned on and off occasionally. 

I found the recipe for these yummy brownies at http://annies-eats.com/ and followed her lead with the exclusion of nuts.  Please feel free to add them back in if you choose but I think they are perfect as is!

My only tip is to refrigerate or freeze the brownies before cutting to keep the gooey caramel from running all over your kitchen.  After that, they are perfect at room temperature.  You may have to hose yourself off when you are done but I assure you, it will be worth it!

Enjoy and remember to be careful on the streets....there is a teenager behind the wheel!!!  eeeek!  ;-)


“Today you are You, that is truer than true. There is no one alive who is Youer than You.” 
― Dr. Seuss, Happy Birthday to You!

Happy Birthday Dr. Seuss!!!


Caramel Brownies

For the brownies:
1 cup (2 sticks) unsalted butter
12 oz. bittersweet chocolate, coarsely chopped
1½ cups sugar
4 large eggs
1 tbsp. vanilla extract
1¼ cups all-purpose flour
½ tsp. salt
1½ cups pecan, coarsely chopped (optional)
1 cup semisweet chocolate chips
For the caramel filling:
14 oz. caramel candies, unwrapped
1/3 cup heavy cream

Directions:
Preheat the oven to 350˚ F.  Line a 9×13-inch baking pan with foil and grease the foil well with butter or cooking spray.  Combine the butter and chocolate in a heatproof bowl set over a pan of simmering water.  Heat, stirring occasionally, until completely melted and smooth.   Remove the bowl from the heat.  Whisk in the sugar, eggs and vanilla until incorporated.  Stir in the flour and salt just until combined.  Spread about half of the brownie batter in the bottom of the prepared pan in an even layer.  Bake for 20 minutes.  Remove from the oven, maintaining the oven temperature, and let cool for 20 minutes.

To make the caramel filling, combine the caramel candies and cream in a medium saucepan over medium-low heat.  Heat, stirring frequently, until melted and smooth.   Immediately spread the caramel mixture over the bottom brownie layer.  Pour the remaining brownie batter over the caramel layer, taking care to pour and spread it evenly otherwise it will be difficult to spread evenly over the caramel layer.  Sprinkle the chocolate chips on top of the final brownie layer.  Bake for 20 minutes.  Transfer to a wire rack and let cool completely before slicing and serving.  (To speed cooling, chill in the freezer for at least 30 minutes.)

Lift the brownies from the pan using the edges of the foil.  Remove the foil and cut the brownies into individual squares.  Store in an airtight container.

Recipe from http://annies-eats.com/

Saturday, February 25, 2012

Chocolate Revel Bars

I didn't mean to disappear from my blog, I've been busy with school, work, and life in general.  Typically if I am overwhelmed with work and homework I will do more baking to avoid the stress and work but this last week I actually ignored the oven and completed most of my projects and cleaned half of my house (don't want to be seen as an over achiever) and even started getting my tax papers in order (this required many glasses of wine).  Believe it or not, I haven't baked in an entire week!  Fortunately (or unfortunately for my waistline) I have a lot of baking lined up over the next week, so I will have more to post!


We are starting the weekend off with Chocolate Revel Bars for my boys.  I found this recipe years ago in "Better Homes and Gardens" and the boys have been addicted ever since (me too)!  I am an oatmeal cookie junky and the base of these bars is just like a yummy oatmeal cookie, full of brown sugar and butter (I did NOT eat the cookie dough....but if I did, it was delicious)!  The rich, gooey, chocolate layer is super easy and tastes just like fudge, good enough to eat by the spoonful!  I changed nothing about this recipe except to exclude the 1 cup of chopped walnuts that was originally added to the chocolate layer.  I am not a huge fan of walnuts and chocolate but if you are, add the walnuts to the chocolate mixture along with the vanilla after the chocolate has melted.

I don't have a 15x10 inch baking pan, so I press the oat mixture into the bottom of a larger baking pan without filling the entire base.  I basically form my own 15x10 on one side of my sheet pan.  This dough is really thick and doesn't spread out so it works just fine.


The only problem with these bars is that they are perfect and you won't be able to stop eating them!  Enjoy!


CHOCOLATE REVEL BARS

1 cup butter
2 cups packed brown sugar
2 eggs
2 teaspoons vanilla
2 ½ cups flour
1 teaspoon baking soda
3 cups quick cooking rolled oats
1 14 oz can sweetened condensed milk
1 12 oz package semisweet chocolate pieces
2 teaspoons vanilla

Set aside 2 tablespoons of butter.  In a large mixing bowl beat the remaining butter with an electric mixer on medium speed for 30 seconds.  Add brown sugar; beat until well mixed.  Beat in eggs and 2 teaspoons vanilla.  In another bowl stir together the flour and baking soda; stir in oats.  Gradually stir dry mixture into beaten mixture.  Set aside.

In a medium saucepan combine the reserved butter, the sweetened condensed milk, and the chocolate pieces.  Cook over low heat until chocolate melts, stirring occasionally.  Remove from heat.  Stir in 2 teaspoons vanilla.

Press two thirds of the oat mixture into the bottom of an ungreased 15 x 10 in. baking pan.  Spread chocolate mixture over the oat mixture.  Using your fingers, dot remaining oat mixture over the chocolate.

Bake in 350 oven about 25 minutes or until top is lightly browned (chocolate will still look moist).  Cool on wire rack and cut.


Recipe from Better Homes and Garden

Tuesday, February 14, 2012

Espresso Caramel Bars


Happy Valentine's Day!!!  Taking a day off from my buttermilk quest and getting everyone hyper with some highly caffeinated Espresso Caramel Bars!  I was watching Giada on Food Network one day and she was making these very rich, decadent bars.  I have a love/hate relationship with this woman (ok...maybe it's more of a love/envy relationship).  On one hand she is an excellent cook and has the greatest recipes; on the other hand she eats and eats and eats and still looks perfect and thin!  It is so not fair!  I try not to hold it against her, but it is not always easy.  ;)  

Where was I?  Oh yeah.... so, these bars have a graham cracker crust that is filled with loads of butter (Paula Deen would be proud)..... 


and a layer of gooey, delicious, homemade caramel.... 


then it is topped with a VERY rich espresso chocolate ganache!


Make sure you cut these into very small bars (I cut mine into 1" x 1") as they are extremely rich. Giada decorated her bars with smoked sea salt which is beautiful but not necessary.  I think they look great just as they are!   

Make this recipe to give away as Valentine's gifts to your friends or for a romantic dessert or hide them away and eat them all by yourself!  When you are done stuffing yourself with caramel yumminess, store the bars in the refrigerator!

"All you need is love. But a little chocolate now and then doesn't hurt" Charles M. Schulz

Espresso Caramel Bars adapted from Giada De Laurentis

Crust:
Vegetable cooking spray
12 whole (6 ounces) cinnamon graham crackers, crumbled or 2 cups cinnamon graham cracker crumbs
1/4 cup sugar
1 1/2 sticks (6 ounces) unsalted butter, melted

Position an oven rack in the middle of the oven. Preheat the oven to 350 degrees F. Line the bottom of a 9-inch round springform pan with parchment.  Spray the paper and the sides of the pan with cooking spray.  In the bowl of a food processor, combine the graham crackers and sugar. Process until the mixture resembles fine bread crumbs. Add the melted butter and blend until the mixture forms into clumps. Spread the mixture into the bottom of the prepared pan, pressing gently to form an even layer. Place the pan on a baking sheet and bake for 10 to 12 minutes until the crust is golden. 

Caramel:
1/2 cup heavy cream
1 stick (4 ounces) unsalted butter, at room temperature
1 1/2 cups light brown sugar
1 tablespoon water

While the crust is cooling, in a medium heavy-bottomed saucepan, combine 1/2 cup of cream, butter, sugar, and water. Stir over medium heat until the mixture is smooth. Bring the mixture to a boil and cook, without stirring, until a candy thermometer registers 240 degrees F, about 5 to 7 minutes. Carefully pour the caramel over the warm crust. Cool for 20 minutes. Freeze until firm, about 10 minutes.

Chocolate Layer:
2 cups  bittersweet or semi-sweet chocolate chips
1/2 cup heavy cream
1 3/4 teaspoons instant espresso powder
1 teaspoon smoked sea salt, optional

Combine the chocolate chips and cream in a small bowl and place over a pan of simmering water. Stir until the chocolate has melted and the mixture is smooth, about 3 minutes. Whisk in the espresso powder. Remove the springform pan from the freezer. Pour the chocolate mixture over the caramel layer and smooth with a spatula. Sprinkle the top with smoked sea salt, if using. Refrigerate for at least 1 hour until firm or stick in freezer until firm.   Cut into squares 1” x 1” and then return bars to refrigerator.

Recipe shared on:
Foodie Friends Friday

Wednesday, February 1, 2012

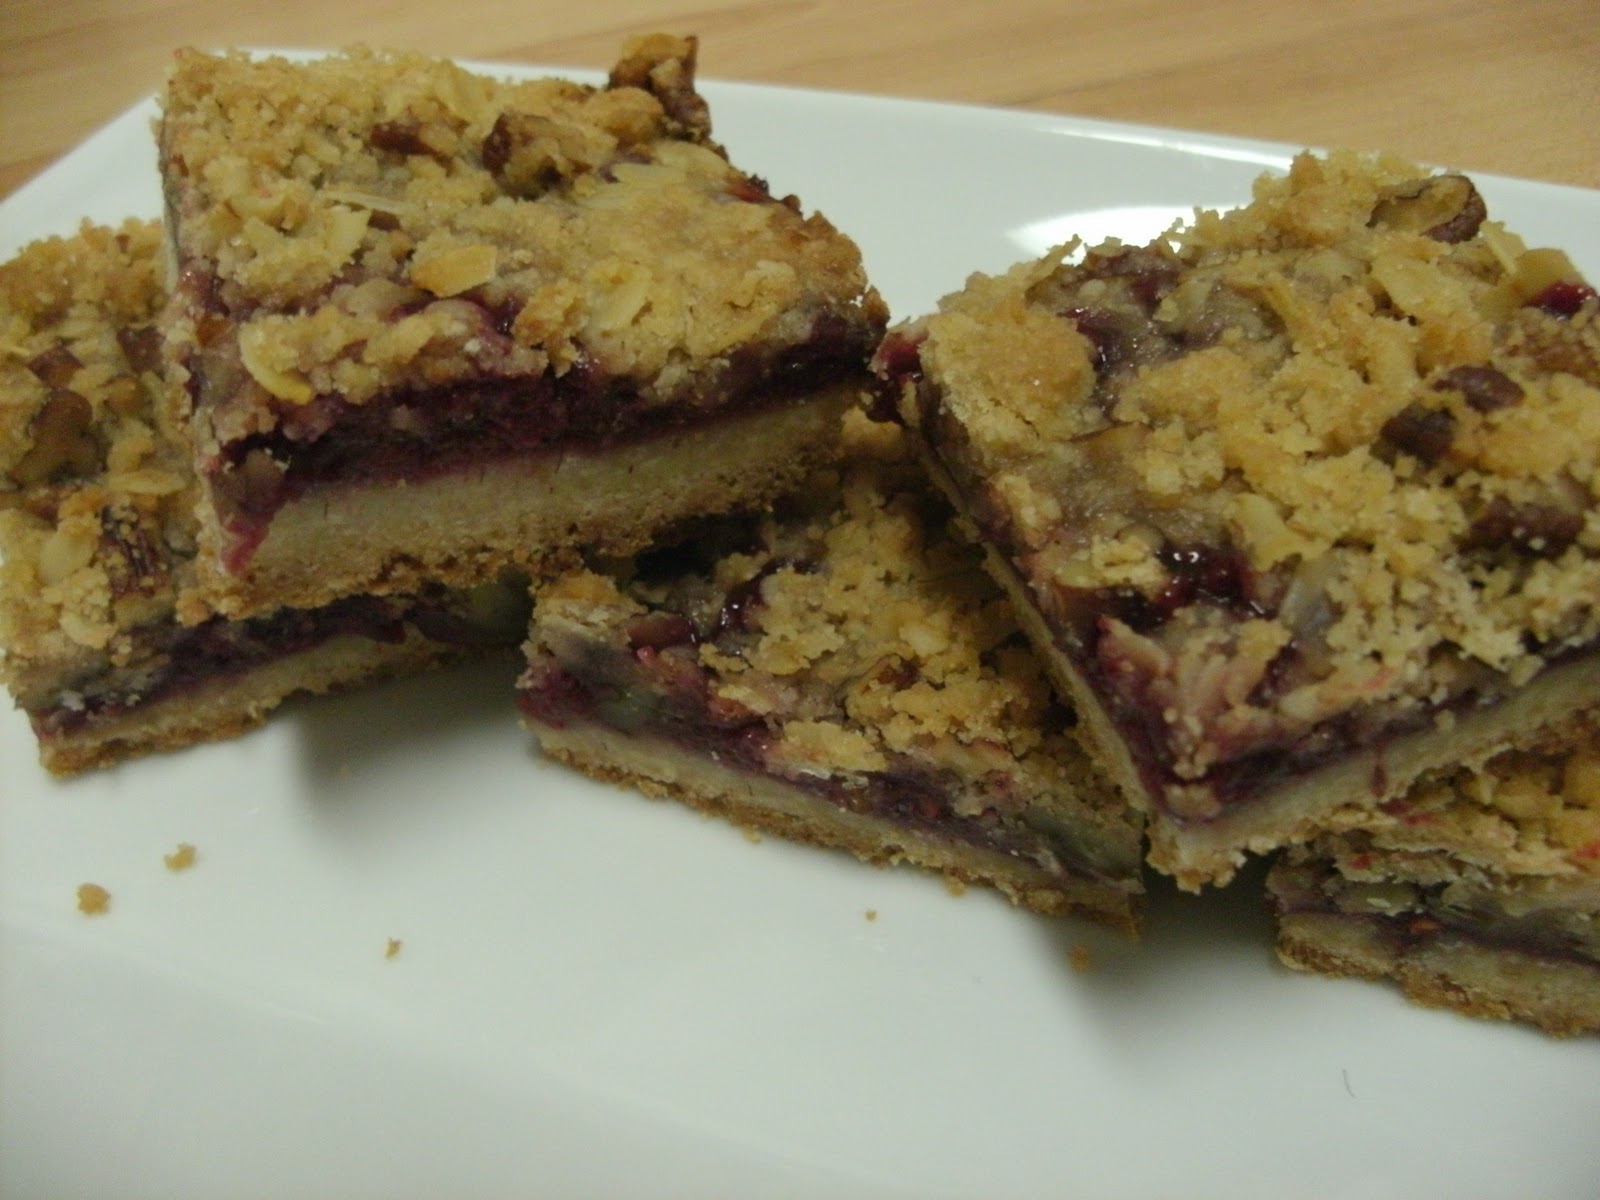
Raspberry Streusel Bars


Ohhhh raspberries...my favorite fruit!  I know it's not summer but I can't wait until summer to have these yummy bars again.  Raspberries may not be in season but they are available all year long if you are willing to pay the price.  You could possibly use frozen raspberries or omit the fresh raspberries all together and add more preserves.  I personally wouldn't change a thing, these bars are perfect!! 

I came across this recipe on my favorite food blog, Brown Eyed Baker, this past spring and I've been hooked ever since.  Michelle (the brown eyed baker) has flawless recipes and I am a devoted follower.  You will see many of her recipes on my site as I continue to build my blog.  I made no changes to the recipe whatsoever, it is perfect as is!  I love the buttery base and the crumbly streusel topping with oats and pecans but my favorite part of these delicious bars is the filling.  Most raspberry bars have a filling of raspberry preserves but this recipe has fresh raspberries crushed in with the preserves.  They are fabulous and addictive!  

Enjoy!  ;)


Raspberry Streusel Bars

2½ cups all-purpose flour
2/3 cup granulated sugar
½ teaspoon salt
1 cup plus 2 tablespoons unsalted butter, divided, cut into ½-inch pieces and at cool room temperature
¼ cup light brown sugar
½ cup old-fashioned rolled oats
½ cup (2 ounces) pecans, chopped fine
¾ cup (8½ ounces) raspberry preserves
¾ cup (3½ ounces) fresh raspberries
1 tablespoon lemon juice

Preheat the oven to 375 degrees F. Line a 9×13-inch pan with foil so it hands over the edges. Spray the foil-lined pan with nonstick cooking spray.

In the bowl of a stand mixer fitted with a paddle attachment, mix the flour, granulated sugar and salt at low speed to combine, about 5 seconds. With the machine on low, add 1 cup of the butter, 1 piece at a time, then continue mixing on low until the mixture resembles damp sand, 1 to 1½ minutes. (If using a food processor, process the flour, granulated sugar, and salt until combined, about 5 seconds. Scatter the 1 cup of butter pieces over the flour mixture and pulse until the mixture resembles damp sand, about twenty 1-second pulses.)

Measure 1¼ cups flour mixture into a medium bowl and set aside; distribute the remaining flour mixture evenly in the bottom of the prepared baking pan. Using your fingers or the bottom of a measuring cup, firmly press the mixture into an even layer to form the bottom crust. Bake until the edges begin to brown, 14 to 18 minutes.

While the crust is baking, add brown sugar, oats, and nuts to the reserved flour mixture; toss to combine. Work in the remaining 2 tablespoons of butter by rubbing the mixture between your fingers until the butter is fully incorporated. Pinch the mixture with fingers to create hazelnut-sized clumps; set streusel aside.

Combine preserves, raspberries, and lemon juice in a small bowl; mash with a fork until combined but some berry pieces remain.

Spread the filling evenly over the hot crust; sprinkle the streusel topping evenly over the filling (do not press streusel into filling). Return the pan to the oven and bake until the topping is a deep golden brown and the filling is bubbling, 22 to 25 minutes. Cool to room temperature on a wire rack, 1 to 2 hours; remove from the baking pan by lifting the foil extensions. Cut into squares and serve. The bars can be stored in an airtight container at room temperature.

Recipe adapted from browneyedbaker.com

Monday, January 23, 2012

Triple Chocolate Espresso Brownies and Mystery Tools!


This weekend I was lucky enough to work for my favorite caterer, Monica Hobbs, as she catered a 40th Birthday Party!  Even luckier.....I got to bake!  I made a variety of goodies, which you will all be seeing in my postings over the week, including these brownies, raspberry crumble bars, dulce de leche cupcakes, and lemon tartlets!  All were a big hit!  

Before we go any further, we are going to play a little game!!!  Below is a picture of my favorite Christmas gift.  When I opened this I had no idea what it was but now that I have it, I use it every day.  Take a good look and see if you can figure it out!


Ok...back to brownies!  These brownies are a favorite when I bake for friends, they are super rich and chocolatey and have a subtle espresso flavor that goes perfectly with all that dark chocolate.  I love to make them because they are easy and everyone loves brownies!  The trick to making great brownies is the chocolate.  I use a mixture of unsweetened chocolate, semi-sweet chocolate chips and then for the chocolate treat in the middle I chop up chocolate bars and stir them into the batter.  Do not just use any old hershey bar, we are talking a quality dark chocolate candy bar, like Scharffenberger.

When you are done baking and cooling the sheet pan, place in the refrigerator for a few hours.  This makes cutting the brownies much easier as they do not have much flour in them and need to really be solid in order to cut.  After cut you can store in refrigerator or at room temperature.  I always dust mine with powdered sugar but you could leave them plain or make a chocolate ganache frosting.  Cut into small pieces because these brownies are far to rich to eat a large square.  Hope you enjoy the recipe!
  
Answer time!  Did you figure it out yet?  This tool is used for pulling out and pushing in the racks in the oven!  My youngest son made it for me in woodshop at school and wrapped it up for Christmas.  I think it is beautiful and I absolutely love it and use it every time I bake!  Luckiest Mom ever!

Recipe shared on:
Foodie Friends Friday

Triple Chocolate Espresso Brownies

1 pound butter
1 pound semisweet chocolate chips
12 ounces chopped bittersweet chocolate (or your favorite dark chocolate bar, chopped)
6 ounces unsweetened chocolate
6 extra-large eggs
3 tablespoons instant espresso powder
2 tablespoons pure vanilla extract
2 1/4 cups sugar
1 1/4 cups all-purpose flour
1 tablespoon baking powder
1 teaspoon salt

Preheat oven to 350 degrees F.

Butter and flour a 12 x 18 x 1-inch baking sheet.

Melt together the butter, 1 pound of chocolate chips, and the unsweetened chocolate in a medium bowl over simmering water. Allow to cool slightly.

In a large bowl, stir together the eggs, espresso, vanilla, and sugar. Stir the warm chocolate mixture into the egg mixture and allow to cool to room temperature.

In a medium bowl, sift together 1 cup of flour, the baking powder, and salt. Add to the cooled chocolate mixture. Toss the 12 ounces of chocolate in a medium bowl with 1/4 cup of flour, then add to the chocolate batter. Pour into the baking sheet.

Bake for 20 minutes, then tap the baking sheet against the oven shelf to force the air to escape from between the pan and the brownie dough. Bake for about 15 minutes, until a toothpick comes out clean. Do not overbake! Allow to cool thoroughly, refrigerate, and cut into squares or triangles.

Dust with powdered sugar if desired.

Adapted from the Barefoot Contessa Cookbook

For the best caterer with the most beautiful venue check out: http://www.nimitzmansion.com/