Showing posts with label Pastry. Show all posts

Friday, January 24, 2014

Cream Puffs


About 6 years ago I took a French Patisserie baking course through a local cooking school.  I learned to make puff pastry, baba au rhum, palmiers and pâte à choux.  Since that time I have only ever made a pâte à choux for gougères one time.  All those hours in a classroom and I haven't done a thing with it!

For those of you who are not familiar with pâte à choux I will give a little background:  choux pastry, or pâte à choux (pronounced: paht ah shoo), is a light pastry dough used to make profiteroles (cream puffs), croquembouches, éclairs, French crullers, and gougères.  

Sounds super fancy and difficult....right?  Well, it is not.  It is actually very simple to make and fairly fool proof.  There are very few ingredients in it, you need a mixer and you need an oven.  Most people pipe the dough onto parchment paper but you could just as easily scoop spoonfulls.

The ingredients are cooked on the stove top, the flour is added and then cooked a bit....then you put the dough into your mixing bowl to cool for a bit (we don't want to cook those eggs as we mix them in)!


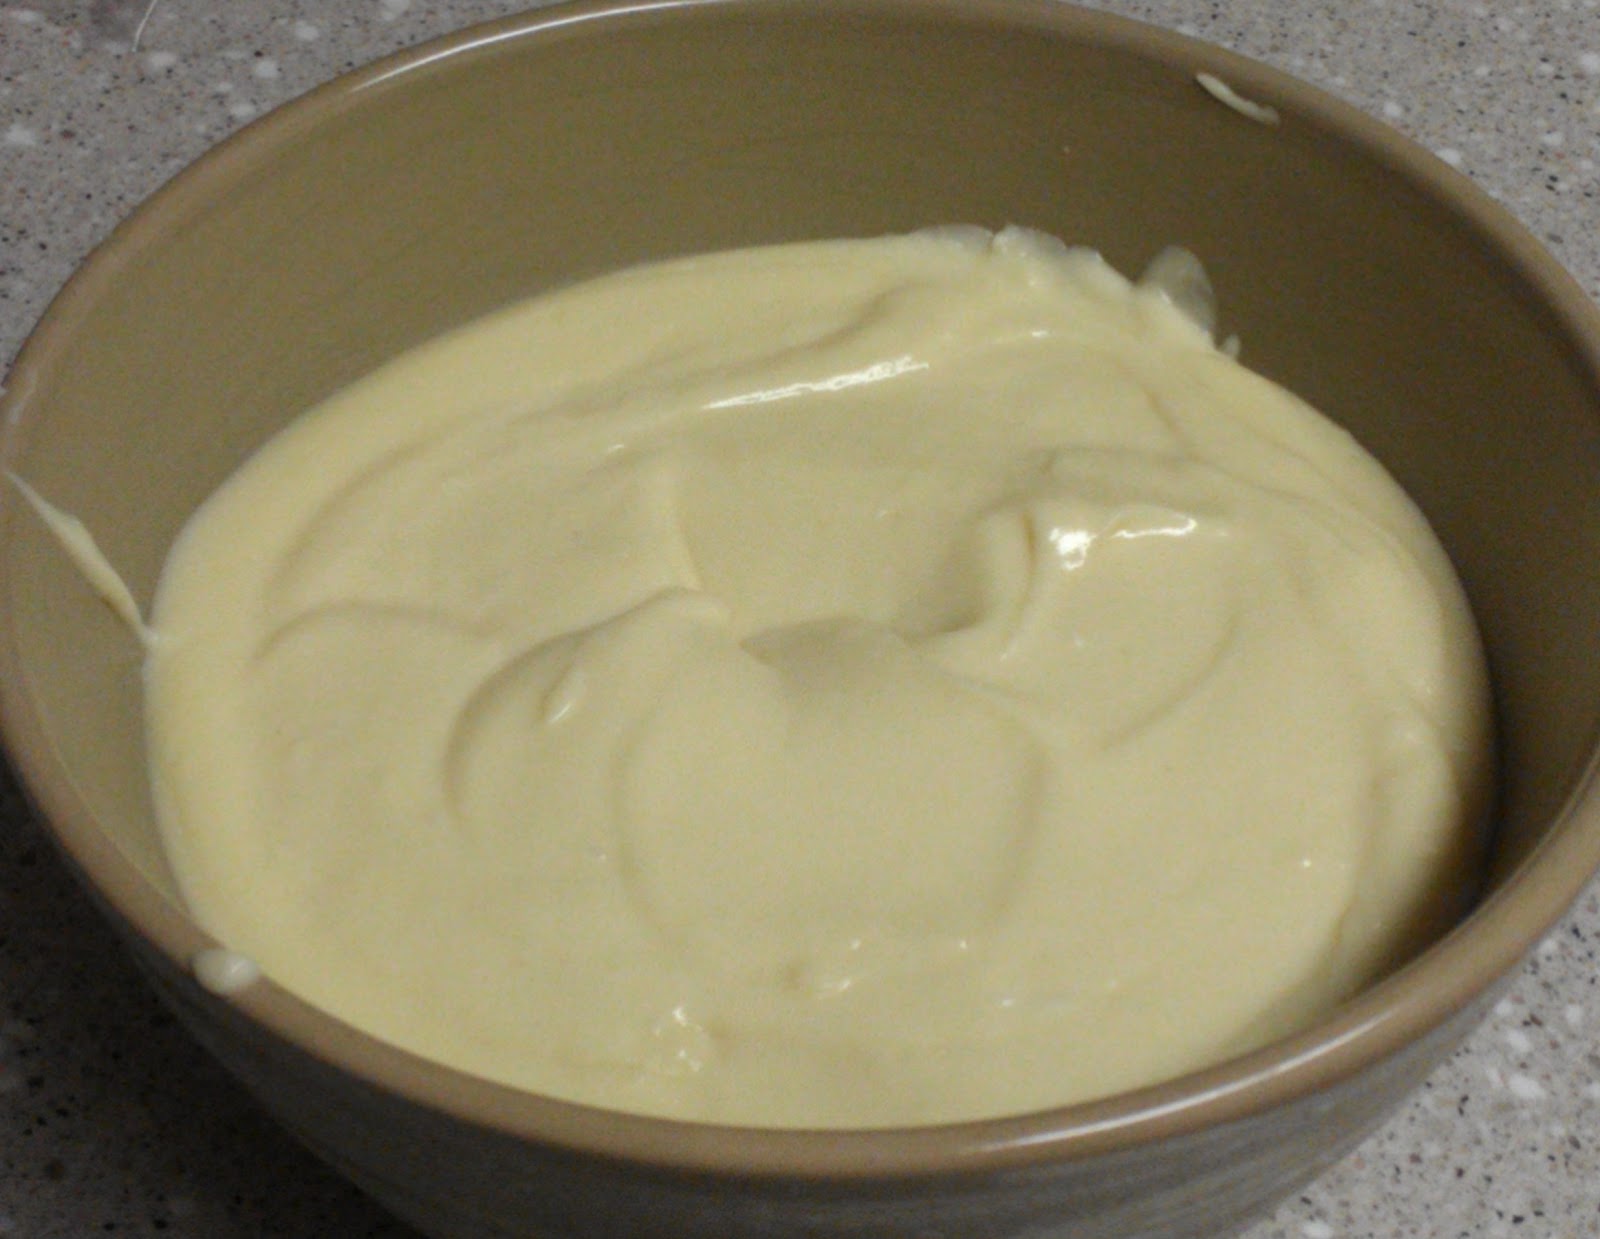
Once it has cooled you beat the eggs in and you will have a nice smooth batter that is easy to pipe. (Not the smoking kind of pipe....the piping bag kind of pipe.  Geez....get your minds out of the gutter)


It really doesn't matter how you pipe them, what size, what shape, etc.  It only matters that they are all uniform so that they bake at the same time.


The baking time may seem pretty long for these little beauties but you really want to make sure the inside isn't doughy and that it dries out.  I tend to sacrifice one of the puffs and open it up and make sure the dough is cooked through.  The only other way to know for sure is through experience of doing it time and time again.


Once they are cooled, fill them with anything you like.  I did a sweetened whipped cream but I think a pastry cream would be fabulous or even a chocolate mousse!


Seems pretty simple doesn't it?  I love when those desserts that we think of as fancy are really simple and not a lot of work.  I guarantee if you make these for dessert, your guests will be truly impressed with you!

Cream Puffs adapted from King Arthur Flour
makes 2 dozen pastries (depending on size you make them, mine were 2" in diameter)

Choux batter:
1 cup water
1/2 cup (8 tablespoons) unsalted butter
3/8 teaspoon salt
1/2 teaspoon sugar
1 1/4 cups all-purpose flour
4 large eggs

Preheat the oven to 400F. Line two baking sheets with silpat or parchment paper.

Combine the water, butter, and salt in a medium-sized saucepan, heat until the butter has melted, and bring to a rolling boil.

Remove the pan from the heat, and add the flour all at once, stirring vigorously.

Return the pan to the burner and cook over medium heat, stirring all the while, until the mixture smooths out and follows the spoon around the pan; this should take less than a minute.

Transfer the mixture to a mixer, and let cool for 5 to 10 minutes until warm but not hot.  Beat in the eggs one at a time; it'll look curdled at first, but when you add the last egg it should become smooth. Beat for at least 2 minutes after adding the last egg.

Scoop batter into piping bag and pipe small mounds 1 1/2 - 2 inches in diameter (can make any size, adjust baking times accordingly).  Space the mounds about 3" apart, to allow for expansion. Wet your finger tip to smooth down any tips on the mounds (to avoid burning).

Bake the pastries for 15 minutes, then reduce the oven temperature to 350°F and bake for an additional 15-20 minutes, until pastries are a medium golden brown and sound hollow when you tap on them. Don't open the oven door while the pastries are baking.

Remove the pastries from the oven and turn oven off.  Make a small slit in the side of each, and return them to the oven for 5 minutes, to allow the steam to escape. Place them on a rack to cool. 

Whipped cream filling:
2 cups whipping cream
6 tablespoons powdered sugar
1 teaspoon vanilla

Place ingredients into mixer and mix on high until stiff peaks form.

Chocolate glaze:
2/3 cup (4 oz) good quality dark chocolate chips
2 tablespoons unsalted butter
1 tablespoons milk

Melt the chocolate and butter together in a microwave or double boiler, then stir in enough milk to make it smooth.

Assemble cream puffs:
Split puffs in half and pipe or spoon whipped cream into shells.  Replace shell lid and spoon melted chocolate glaze over the top.  Serve immediately or store in refrigerator for up to a few hours.

These are versitile shells and can be filled with pastry cream or whipped cream or any other filling.  You can pipe the filling into the center instead of splitting them in half. You can top the shells with powdered sugar or any other glaze.  Make them to suit your tastes and enjoy!!!

Recipe Shared On:
Freedom Fridays
Strut Your Stuff Saturday Link Party
Hearth & Soul Blog Hop
Wednesdays Adorned From Above Link Party
What'd You Do This Weekend

Sunday, February 24, 2013

Brown Sugar Cinnamon Pop Tarts


Remember when I made homemade S'mores pop tarts?  I may have mentioned that I don't like them from the box.  I may have also mentioned that I'm insane and a push-over and I make almost anything my kids ask me to make.  Proof I am a push-over...these brown sugar cinnamon pop tarts.  Proof I am insane...made these the same day as my Angelic Brownies and Pizza Spaghetti.  The boys both got it into their heads that they should start looking for recipes on the internet for me to make and then they both begged...and offered to help cook...and offered to help clean up....and basically....I'm a pushover....so.....I said yes. 


I did get some help with the pizza spaghetti, the pepperoni didn't make it on that casserole itself....and those oreos....they didn't climb into my angelic brownies on their own.  Yes, the kids did help that much....then they disappeared.  No where to be found....until it was time to eat.  Then they were both there and very excited about what "they" had created for dinner. Still...totally worth all of the work, they were so proud to have me make AND blog their recipes!


This one I did all by myself.  Kind of involved and a lot of steps to get the dough ready, but totally worth it!  They were gone before they even finished cooling (thus the lack of many photos) and I even got to eat one.  No pop tart has ever tasted so good!  Seriously, I liked them even more than my s'mores pop tarts (and those were super yummy).


Moral of the story?  Having your kids search for and choose recipes....great, having your kids help you cook...so much fun, having your kids help you clean up after all that cooking.....I wouldn't know, they keep disappearing, but I imagine it would be great!  (Just kidding!  Seriously, my kids are awesome and great helps in the kitchen.  Especially when I threaten to never bake for them again!)  

Brown Sugar Cinnamon Poptarts via Chow.com

Dough:
2 cups all-purpose flour
1 tablespoon granulated sugar
1 teaspoon ground cinnamon
1 teaspoon fine salt
2 sticks (8 ounces) cold butter, cut into 1/2-inch cubes
2 large egg yolks
1/4 cup milk 

Filling:
5 tablespoons packed dark brown sugar
5 teaspoons granulated sugar
1 tablespoon all-purpose flour
3/4 teaspoon ground cinnamon


Glaze:
3/4 cup powdered sugar, sifted
4 teaspoons milk, plus more as needed
1/2 teaspoon ground cinnamon
1/4 teaspoon vanilla extract

INSTRUCTIONS:

Combine the ingredients for the filling and set aside.

Make the dough: Whisk the flour, sugar, cinnamon, and salt in a large bowl until combined. Add the butter and toss with your fingers until well coated in the flour mixture. Using a pastry blender or your fingers, cut the butter into the dry ingredients until reduced to pea-size pieces.  Whisk the egg yolks and milk in a small bowl until combined and add to the flour mixture, mixing with your hands until large clumps form. 

Turn the mixture out onto a work surface and knead briefly, smearing the butter into the dough with the heel of your palm until the dough completely comes together, about 1 minute.

Divide the dough into 2 equal portions and shape into 2 (6-by-5-inch) rectangles. Wrap each tightly in plastic wrap and refrigerate for at least 1 hour. 

Heat the oven to 375°F. Line a baking sheet with parchment paper; set aside.

Lightly dust a work surface with flour and roll 1 dough portion out into a rough 12-by-10-inch rectangle, rotating the dough and re-flouring the surface and rolling pin often to prevent the dough from sticking.

Using a pizza cutter or sharp knife, trim the dough to a 10-1/2-by-9-inch rectangle.

Cut that into 6 equal rectangles (each about 3 1/2 inches wide by 4 1/2 inches tall).

Using a flat spatula, transfer the rectangles to the prepared baking sheet, leaving about 2 inches of space between each.

Roll out the second dough portion to the same dimensions as the first, trim, and cut into 6 rectangles. Using a fork, prick the dough all over.  

Divide the brown sugar–cinnamon filling among the rectangles on baking sheet. Spread the filling into an even layer, leaving a 3/4-inch border.  Place the pricked rectangles on top of the brown sugar–cinnamon-covered rectangles.  Press on the edges to adhere, and push down gently on the filling to slightly flatten. Using a fork dipped in flour, crimp the edges of the tarts. 

Bake until golden brown, about 23 to 25 minutes. Transfer to a wire rack and let cool completely before glazing.

For the glaze:
Place all the ingredients in a small bowl and whisk until evenly combined. (You may need to add more milk by the 1/2 teaspoon if the glaze is too thick.)
Set the wire rack with the tarts on it over a baking sheet. Using a spoon, drizzle about 1 tablespoon of the glaze over each tart. Let set before eating, about 15 minutes.


Recipe shared on:
Adorned From Above - Wednesday Blog Hop
21st Century Housewife - Hearth and Soul Blog Hop
Chocolate, Chocolate and More - Thursday's Treasures
Weekend Kitchen Creations
Foodie Friends Friday
Food Frenzy

Tuesday, November 20, 2012

Maple Pumpkin Pie with Streusel


This year I am not making Thanksgiving dinner.  I know....(gasps loudly)!  I am having a wonderful and exciting and special Thanksgiving with my Mom.  We are dressing up and heading to San Francisco for a wonderful dinner in a beautiful hotel!  Super excited!

Even though I'm not cooking, I am still in baking mode!  I have put out an offering for all of my clients to purchase for their very own special Thanksgiving dinners.  My first offering is a beautiful freeform apple pie or galette.  You know it on my blog as "Apple Crunch Pie".  I am also offering this delicious Maple Pumpkin Pie with Streusel!  So excited!  This pie is beautiful AND delicious with a hint of maple in the pie and a fabulous streusel on top.  

Hope you and your families are enjoying this holiday together and that your day is filled with yummy food and a lot of love!

Happy Thanksgiving!

Maple Pumpkin Pie with Streusel  adapted from Sunset Magazine

Crust:
6 tablespoons very cold unsalted butter, cut into 1/2 inch pieces
1 1/2 cups all-purpose flour
1/2 teaspoon kosher salt
1/2 tablespoon sugar
5 tablespoons very cold vegetable shortening
3-4 tablespoons ice water

Place the flour, salt, and sugar in the bowl of a food processor fitted with a steel blade and pulse a few times to mix. Add the butter and shortening. Pulse 8 to 12 times, until the butter is the size of peas. With the machine running, pour the ice water down the feed tube and pulse the machine until the dough begins to form a ball. Dump out on a floured board and roll into a ball. Wrap in plastic wrap and refrigerate for 30 minutes.

Roll dough on a well-floured board into a circle, rolling from the center to the edge, turning and flouring the dough to make sure it doesn't stick to the board. Fold the dough in half, place in a pie pan and return to the refrigerator until filling is ready.

Maple Pumpkin Filling:
1/4 cup granulated sugar 
1/4 cup firmly packed dark brown sugar 
3T - 1/4 cup maple syrup (depending on how sweet you like it)
1 tablespoon all-purpose flour 
1 1/2 teaspoons ground cinnamon
1/4 teaspoon ground nutmeg
1/2 teaspoon salt
1/4 teaspoon ground ginger
1 can (15 oz.) pumpkin 
1 can (12 oz.) evaporated milk 
2 large eggs, beaten to blend 

Preheat oven to 375°. In a bowl, mix granulated sugar, brown sugar, maple syrup, flour, cinnamon, nutmeg, salt, and ginger. Add pumpkin, milk, and eggs; whisk until well blended.

Pour mixture into unbaked 9-inch pie pastry in pan.  Bake for 25 minutes, then sprinkle walnut streusel evenly over filling. and return to oven.  Bake for an additional 45 minutes or until knife inserted in center comes out clean.

Set on a rack until cool to touch, about 2 hours, chill until ready to serve

Walnut Streusel:
1/4 cup firmly packed light or dark brown sugar
1/4 cup rolled oats
1/4 cup chopped walnuts
1/4 cup all-purpose flour 
1/2 teaspoon ground cinnamon
1/8 teaspoon ground nutmeg
1/4 cup butter, cut into cubes

In a bowl, combine all ingredients and cut butter into mix, using pastry cutter until crumbly.


This recipe is shared on:


Friday, August 24, 2012

Fruit Tart


It's time for Vegas baby....I'm feeling lucky!!!  I am forever entering contests, buying raffle tickets, throwing my business card into the basket to win a free lunch.  Never, and I do mean NEVER do I ever win.  But this month is MY month!  I entered to win a Moleskin Travel Journal on Christine's blog "Esskunst-Love who you are".  I was actually travelling when I got the news from her that I had won....such a coincidence!!!  You should really head on over and check her out....so many great recipes!


Then, this morning I wake up to an email from Lauren at "Part Time House Wife" telling me that I won her contest and a weeks supply of Brown Cow Cream Top Greek Yogurt!!!  I LOVE greek yogurt, especially with fresh berries and honey drizzled over the top!  Super excited!!!  You have got to check out Lauren's recipe for BLT Pizza.....it is to die for!!!

So now you see it...I'm on a roll, it's my lucky streak....I need to start buying lotto cards or playing the slots! I might actually win!!!  Well, since we all know I'm not about to waste my money on lotto tickets and with school starting I have NO time for Vegas, I will have to stick with my lucky recipes!  I totally lucked out this week with my newest....A fresh fruit tart!


The recipe comes from Baking Illustrated, which I don't own and had to borrow, and is one of the BEST baking bibles out there.  I'm serious, if you are reading this and want to do a giveaway on your blog, this book would make a great giveaway and I would be the first person in line to enter the contest!  I know, I know...I could just buy the cookbook but I'm super cheap frugal like that!


The recipe is FABULOUS!!  Honestly.... I made the pastry cream, tasted it and spent the next 20 minutes with my face in the pan, making sure I licked the entire thing clean!  I was starting to eat it with a large serving spoon before I came out of my food trance and remembered that I was making this for a client and should probably make sure I have enough pastry cream left to fill the pastry! Ummm....that was embarrassing, I probably shouldn't have told you that.  Please don't judge me!


The pastry was EASY!  If you don't have a food processor you can still make it, but the food processor makes it so quick and that gives you more time to go back to tasting your pastry cream.  I mean really, I'm sure the client would be ok having a fruit tart with just fruit.  Do they really NEED the pastry cream?  Na, I should just take it off their hands!  ;)


Use any fruit you like!  Berries are beautiful right now, so that is what I chose with the addition of kiwi for it's beautiful color.  You could use stone fruit, tropical fruit, etc.


Now, here is the important part....IF you have any pastry cream left after tasting it to make sure it tastes ok and won't poison your family, then you should spread the cream into the bottom of your tart shell.  If you don't have any left, then make another batch, you really need it for the tart!


Pile all of that gorgeous fruit on top of the pastry cream and VOILA!!!!  Perfection!  You could melt some beautiful jam to brush on top of your tart to make it glossy and gorgeous but I think mine is gorgeous without that extra step.  And seriously, it won't last long enough for anyone to notice that it is glossy!  

The crust is perfection, reminding me of a shortbread cookie.  We already know how I feel about the pastry cream, and the berries, which really are the star of the dish, are sweet and juicy and beautiful!  Really, this is my idea of the perfect dessert.  The only thing that would make it better would be a bottle of red and friends to share it all with!  

Did I tell you that I liked the pastry cream?  ;)

This recipe is featured on:

Fruit Tart

For the Crust:
1 egg yolk
1 tablespoon heavy cream
½ teaspoon vanilla extract
1¼ cups all-purpose flour
2/3 cup powdered sugar
¼ teaspoon salt
8 tablespoons cold unsalted butter, cut into ½-inch cubes

Whisk together the yolk, cream and vanilla in a small bow; set aside. Place the flour, sugar and salt in a food processor and process briefly to combine. Scatter the butter pieces over the flour mixture; process to cut the butter until the mixture resembles coarse meal, about fifteen 1-second pulses. With the machine running, add the egg mixture and process until the dough just comes together, about 12 seconds. Turn the dough onto a sheet of plastic wrap and press into a 6-inch disk. Wrap in plastic and refrigerate at least 1 hour or up to 48 hours.

Remove the dough from the refrigerator (if refrigerated longer than 1 hour, let stand at room temperature until workable). Unwrap and roll on a lightly floured surface to a 13-inch round. Transfer the dough to a 9- to 9½-inch tart pan. Ease the dough into the pan corners and press the dough against the fluted sides of the pan. If some sections of the edge are too thin, reinforce them by folding the excess dough back on itself. Run the rolling pin over the top of the tart pan to remove the excess dough. Prick the bottom and sides of the dough all over with a fork. Set the dough-lined tart pan on a large plate and freeze for 30 minutes.

Preheat oven to 375 degrees F. Set the dough-lined tart pan on a baking sheet, press a square of foil into the frozen tart shell and over the edge, and fill with metal or ceramic pie weights. Bake for 30 minutes, rotating halfway through the baking time. Remove from the oven and carefully remove the foil and weights. Continue to bake until deep golden brown, 5 to 8 minutes longer. Set the baking sheet with the tart shell on a wire rack and cool to room temperature.

For the pastry cream:
2 cups half-and-half
½ cup granulated sugar, divided
Pinch of salt
5 egg yolks
3 tablespoons cornstarch
4 tablespoons cold unsalted butter, cut into 4 pieces
1½ teaspoons vanilla extract

Heat the half-and-half, 6 tablespoons of the sugar, and the salt in a medium heavy-bottomed saucepan over medium heat until simmering, stirring occasionally to dissolve the sugar.

Meanwhile, whisk the egg yolks in a medium bowl until thoroughly combined. Whisk in the remaining 2 tablespoons sugar and whisk until the sugar has begun to dissolve and the mixture is creamy, about 15 seconds. Whisk in the cornstarch until combined and the mixture is pale yellow and thick, about 30 seconds.

When the half-and-half mixture reaches a full simmer, gradually whisk the simmering half-and-half into the yolk mixture to temper. Return the mixture to the saucepan, scraping the bowl with a rubber spatula; return to a simmer over medium heat, whisking constantly, until a few bubbles burst on the surface and the mixture is thickened and glossy, about 30 seconds. Off the heat, whisk in the butter and vanilla. Strain the pastry cream through a fine-mesh sieve set over a medium bowl. Press plastic wrap directly on the surface to prevent a skin from forming and refrigerate until cold and set, at least 3 hours or up to 2 days.

Assemble the tart:
3 cups assorted berries, kiwi or stonefruit

Remove the outer ring of the tart pan and place tart shell on serving plate.  Spread the pastry cream evenly inside of the tart shell and arrange the assorted fruit over the top of the pastry cream.  

Refrigerate tart until time to serve.


Recipe adapted from Baking Illustrated

Thursday, July 5, 2012

Cherry Hand Pies


4th of July!  When I think of 4th of July, I think of parades and BBQs and fireworks!  Growing up it was always a special holiday, as I have a very patriotic family and there is no more patriotic holiday than the 4th of July.  I remember going to parades and every time an American flag would pass by, Mom would make me stand.  Up, down, up, down for the entire parade.  It probably would have been easier if I'd just stayed standing! Mom and I joke about it now but I have to tell you, whenever I am at a parade and the flag passes, I find myself standing, hand on heart! :)

The boys were with their Dad for fireworks this year so I wasn't planning on doing anything to celebrate but at the last minute I had a few friends over for an impromptu dinner.  It was not your typical 4th of July meal but it was soooooo delish!!!  My friend Jen made a yummy baked cod dish and nectarine salad that was to die for!  I made summer corn cakes with avocado salsa, which I promise to blog about another day, they were so yummy!

Of course, I was in charge of dessert.....what to make???  I planned on doing something with apples until my niece, Samantha, posted on Baker Becky's Facebook fan page (here) that she would like me to make a cherry dessert for the blog.  I LOVE homemade cherry pie but I know that Samantha doesn't have a rolling pin (and I'm opposed to store bought pie crust) so I decided to make Cherry Hand Pies, which use puff pastry!  I saw the recipe in Bon Appetit last year and meant to make them but completely forgot.  Couldn't find the magazine anywhere so thank God for Epicurious.com!!!  The recipe (here) is simple and the ingredients easy to find at any grocery store.


The other reason I wanted to make these hand pies rather than a traditional pie is that I wanted to use my new silpats!!!  My good friend Kim (here) is a representative for Demarle At Home and I just got my new Silpats from her.  My old Silpats lasted at least 15 years (which is a long time for someone who uses them almost daily) and I have been flying through the rolls of parchment paper.  So happy to have the new mats so that I am not  using so much paper! No sticking and easy cleanup from the cherry juice that drizzled out of my hand pies!! 


I love this recipe because it uses puff pastry which is easy for anyone to use, even those who are not experienced bakers.  I used Pepperidge Farms because that's what I have available to me but feel free to use any brand.   I defrosted each sheet in the refrigerator and then rolled them to make them a little longer, but this is not necessary if you don't have a rolling pin.  The only real work to this recipe is pitting the cherries.  I'll admit it is a bit of a pain-in-the-you-know-what, but it's not impossible!  Cut your cherry in half and pull out the pit, ta da!!  If you have a cherry pitter it is even simpler!!


Totally worth any extra work from pitting the cherries because these are delicious!  Those of you who don't like cherry pie have probably had pie filling from a can.  Trust me, fresh cherry pie is unbeatable!!  Perfect for 4th of July or any summer BBQ!!  

Cherry Hand Pies

1 1/2 tablespoons cornstarch
2 cups fresh cherries, stemmed and pitted, or about 12 ounces frozen pitted cherries, unthawed
2/3 cup dried cherries
1/2 cup sugar
1 teaspoon vanilla extract
1/8 teaspoon kosher salt
1 14-ounce package all-butter puff pastry,  thawed in refrigerator
Flour (for dusting)
1 large egg white
1 1/2 teaspoon course sugar

Line a large rimmed baking sheet with a silpat mat (can use parchment paper). Stir cornstarch and 1 1/2 tablespoons cold water in a small bowl to blend. Combine fresh cherries and next 4 ingredients in a large saucepan. Cook over medium heat, stirring occasionally, until cherry juices are released, about 5 minutes. Add cornstarch mixture; bring to a boil, stirring often. Remove from heat and let cool to room temperature, stirring occasionally.

Roll out pastry on a lightly floured surface to an 10 x12" rectangle (if you don't have rolling pin, skip this step). Using a sharp knife or pizza cutter, cut each dough into 4 6x5" rectangles (cut into 4 equal squares). Whisk egg white and 1 tablespoon water in another small bowl for egg wash.

Working with 1 pastry rectangle at a time, place on a work surface and brush edges with egg wash. Scoop 3 tablespoons cherry mixture onto one side; fold dough over filling so that short ends meet, forming a 5x3" packet. Crimp edges with a fork to seal. Using a sharp knife, cut a few slits in top of pie to vent. Place on prepared baking sheet; repeat with remaining dough and filling.

Brush tops with egg wash, then sprinkle with raw sugar. Chill for 30 minutes. Preheat oven to 375°F. Bake pastries until tops and bottoms are golden brown, 30-40 minutes. Let cool for 10 minutes on baking sheet. Transfer to wire racks; let cool completely. DO AHEAD: Can be made 1 day ahead. Let stand at room temperature.

Makes 8 hand pies.

Adapted from Epicurious.com

Recipe shared on:
Foodie Friends Friday

Wednesday, May 16, 2012

Apple Pie Bars


I know, I know, I know......I disappeared off of the face of the earth!  I have been super busy with end of the semester at school, my kids, work, work, and more work!!!  But, I am happy to say.....I'M BACK!!!  :)

Let's start off with a recipe I made for a picnic at a winery last week...Apple Pie Bars!  Who doesn't absolutely LOVE apple pie?  It is one of my favorites but such a pain to make.  These Apple Pie Bars are the easiest to make and taste exactly like apple pie.  If you are going to have a picnic, whether at a winery or at the park, you really must have an apple pie and these hold up well in the heat since they do not require refrigeration.  

I found the recipe in a Food & Wine cookbook that I bought at a garage sale for $1!  You really can't beat that!  This cookbook is fabulous and full of wonderful recipes, including the following!  Enjoy the recipe and don't be afraid of the crust, it is far easier than any regular pie crust and tastes wonderful!

Enjoy!!


Apple Pie Bars

Crust:

3 sticks unsalted butter, softened
3/4 cup sugar
3 cups all-purpose flour
1/2 teaspoon kosher salt

Filling:
6 tablespoons unsalted butter
1/2 cup light brown sugar
12 Granny Smith apples (about 6 pounds)—peeled, cored and thinly sliced
1 tablespoon cinnamon
1/4 teaspoon freshly grated nutmeg
1 cup water, as necessary

Topping:
3/4 cup walnuts
3 cups quick-cooking oats
2 cups all-purpose flour
1 1/2 cups light brown sugar
1 1/4 teaspoons cinnamon
1/2 teaspoon baking soda
1/2 teaspoon kosher salt
3 sticks (12 ounces) unsalted butter, cut into 1/2-inch cubes and chilled


Preheat the oven to 375°. Line a 15-by-17-inch rimmed baking sheet or jelly roll pan with parchment paper. In a standing electric mixer fitted with a paddle, beat the butter with the sugar at medium speed until light and fluffy, about 2 minutes. At low speed, beat in the flour and salt until a soft dough forms. Press the dough over the bottom of the prepared pan and 1/2 inch up the side in an even layer. Bake in the center of the oven for about 20 minutes, until the crust is golden and set. Let cool on a rack.

In each of 2 large skillets, melt 3 tablespoons of the butter with 1/4 cup of the light brown sugar. Add the apples to the skillets and cook over high heat, stirring occasionally, until softened, about 7 or 8 minutes. Stir half of the cinnamon and nutmeg into each skillet. Cook until the apples are caramelized and very tender and the liquid is evaporated, about 5 minutes longer; scrape up any bits stuck to the bottom of the skillets and add up to 1/2 cup of water to each pan to prevent scorching. Let cool.

Spread the walnuts in a pie plate and toast until golden and fragrant, about 8 minutes. Let cool, then coarsely chop the walnuts. In a large bowl, mix the oats with the flour, light brown sugar, cinnamon, baking soda and salt. Using a pastry blender or two knives, cut in the butter until the mixture resembles coarse meal. Stir in the walnuts and press the mixture into clumps.

Spread the apple filling over the crust. Scatter the crumbs on top, pressing them lightly into an even layer. Bake in the center of the oven for 30-40 mins or until the topping is golden; rotate the pan halfway through baking. Let cool completely on a rack before cutting into 2-inch bars.

MAKE AHEAD The bars can be stored in an airtight container at room temperature for 4 days or frozen for up to a month.

Recipe from Food & Wine

Recipe shared on:
Lemon Sugar
FoodieFriendsFriday - Marlys This and That

Wednesday, April 25, 2012

Chicken Pot Pie


Last weekend it felt like the middle of July here in the bay area, way too hot!  Luckily we are back to the cooler weather of spring and before it gets too hot I want to get a few more cold weather comfort dishes in. I have always loved chicken pot pie with all of those yummy veggies and chicken surrounded by creamy goodness and topped with a flaky golden crust!  (wait a minute while I mop the drool from my chin...)  

I really love Ina Garten's recipe for pot pie, it makes a nice creamy sauce and is full of wonderful vegetables.  I added even more vegetables to the mix and used leftover roasted chicken from dinner the night before.  Feel free to prepare your chicken any way you like, I prefer to roast my chicken and then use the bones to make my homemade stock.  


I also chose to use puff pastry to top the pie but you can make any pastry you like to top yours.  One sheet of puff pastry doesn't quite cover the entire 9 x13" pan so I used 1 1/3 sheets and pinched them together and then ran my rolling pin over to get rid of the seam.  Make sure that you use an egg wash on the top to help give your crust a beautiful golden color!


Better make this soon before the summer weather comes back!!

Enjoy!

Chicken Pot Pie

5 cups cooked chicken, cubed or shredded
5 cups chicken stock, preferably homemade
12 tablespoons (1 1/2 sticks) unsalted butter
1 red onion, chopped
1 cup sliced mushrooms
3/4 cup all-purpose flour
1/4 cup heavy cream
2 teaspoons salt
1/2 teaspoon pepper
1 cup medium-diced carrots, blanched for 2 minutes
1 cup cubed yukon gold potatoes, cooked until tender
1/2 cup asparagus, 2" pieces, blanched
1/2 cup frozen peas
1 cup frozen small whole onions
1/2 cup minced fresh parsley leaves
puff pastry or homemade pastry dough
1 egg beaten w/ 1 tablespoon of water (for egg wash)

In a small saucepan, heat the chicken stock. In a large pot or Dutch oven, melt the butter and saute the onions and mushrooms over medium-low heat for 10 to 15 minutes, until onions are translucent. Add the flour and cook over low heat, stirring constantly, for 2 minutes. Add the hot chicken stock to the sauce. Simmer over low heat for 1 more minute, stirring, until thick. Add 2 teaspoons salt, 1/2 teaspoon pepper, and heavy cream. Add the cubed chicken, all of the vegetables, and parsley. Mix well.

Place in 9x13" dish and top with pastry.  Brush with egg wash and cut slits in pastry for the steam to escape.  Bake in 375 degree F oven for 35-45 minutes or until bubbly and the crust is golden brown all over.

Serves 8

Recipe adapted from Ina Garten on Foodnetwork.com


Tuesday, March 13, 2012

Homemade S'mores Pop Tarts


You heard me!  HOMEMADE POP TARTS!!!  ;)  What a happy day!

I don't remember eating pop tarts as a child.  Mom didn't like junk food for breakfast or sugar cereals (except for Captain Crunch on Christmas).  My first memory of eating one is as an adult and I remember they had the texture of cardboard and were way too sweet.  My children do not have such discriminating tastes, they love them and beg for them all the time.  Every once in a while I will buy a box as a special treat but for the most part pop tarts do not enter my kitchen.  (Ironically, my Mother sneaks them to the kids when I am not looking)

While I don't like to buy the sugary stuff I will make almost anything requested of me.  Knowing this, my youngest put in his order for homemade pop tarts.  The boys discussed it and agreed that they wanted s'mores flavor, of course, why make it easy on Mom and choose strawberry.


I used the pastry recipe on the King Arthur Flour website, I read reviews and everyone agrees this is the best.  For the filling I used my recipe for chocolate fudge that is spread on my Chocolate Revel Bars and a jar of marshmallow fluff.  The fudge recipe makes enough for two batches of pop tarts or you could save the leftovers for another use (or eat it out of the pan with a spoon, not that I would ever do that)!


Tips, tips, tips.....I think they were fabulous and flaky and gooey when right out of the oven.  I can only assume that the boys thought so too because all 9 pop tarts were gone in a day!  I think the only thing I would do differently is to add a drizzle of chocolate on the top of the pop tarts just to make them look a little fancier.   The boys wouldn't change anything except to have me double the recipe next time!

Caught you Max!  Gotta let them cool first!
Enjoy! These are NOT just for kids!!!  ;)

S'MORES POP TARTS


Pastry:

2 cups (8 ½ ounces) Unbleached All-Purpose Flour
1 tablespoon sugar
1 teaspoon salt
1 cup (2 quarter-pound sticks, 8 ounces) unsalted butter, cut into pats
1 large egg
2 tablespoons (1 ounce) milk


Whisk together the flour, sugar, and salt. Work in the butter until the mixture holds together when you squeeze it, with pecan-sized lumps of butter still visible. Mix the egg and milk, and add it to the dough, mixing just until everything is cohesive.

Divide the dough in half; each half will weigh about 10 ounces (about 280g). Shape each half into a rough 3" x 5" rectangle, smoothing the edges. Roll out immediately; or wrap in plastic, and refrigerate for up to 2 days.

Fudge Filling:
2 tablespoons butter

1 14 oz can sweetened condensed milk
1 12 oz package semisweet chocolate pieces
2 teaspoons vanilla

In a medium saucepan combine the butter, the sweetened condensed milk, and the chocolate pieces.  Cook over low heat until chocolate melts, stirring occasionally.  Remove from heat.  Stir in 2 teaspoons vanilla.

Assemble the Tarts:

If the dough has been chilled, remove it from the refrigerator and allow it to soften and become workable, about 15 to 30 minutes. Place one piece on a lightly floured work surface, and roll it into a rectangle about 1/8" thick, large enough that you can trim it to an even 9" x 12".  Cut the dough into nine 3" x 4 " rectangles.

Roll the second piece of dough just as you did the first and again cut nine 3" x 4" rectangles.

Beat the egg, and brush it over the entire surface of the dough. Pipe or spread the fudge filling onto each of the nine rectangles leaving a 1/2" border, I piped two lines of fudge leaving space between them for the marshmallow.  Pipe or spread a row of the marshmallow fluff between the fudge on each rectangle.  Place the second sheet of dough atop the first, using your fingertips to press firmly around each pocket of jam, sealing the dough well on all sides. Press the tines of a fork all around the edge of the rectangles.

Gently place the tarts on a lightly greased or parchment-lined baking sheet. Prick the top of each tart multiple times with a fork; you want to make sure steam can escape, or the tarts will become billowy pillows rather than flat toaster pastries. Refrigerate the tarts (they don’t need to be covered) for 30 minutes, while you preheat your oven to 350°F.

Bake the tarts for about 25 minutes or until golden brown.  Remove from oven and allow to cool.

Makes 9 pop tarts.

Pastry recipe from kingarthurflour.com


Thursday, January 26, 2012

Foodgasms and Mini Tarts


Food in miniature form is so much fun!  I love going to cocktail parties and eating little appetizers and little desserts.  In theory, small food is great because you can try one of everything and not over-stuff yourself.  Ok, ok, ok.....so maybe I still over-stuff myself, but the food looks so adorable that it's hard not to.  These mini tarts are no exception.  I think they are adorable with their cute little shortbread crusts and their fabulously rich fillings and, hey, they are topped with fruit so they must be super healthy!  Even if they are not super healthy, when you take a bite you will for sure experience a foodgasm!  Yes, it's a real word!  According to Urban Dictionary A foodgasm is the euphoric sensation upon tasting amazingly delicious food.  I don't typically follow Urban Dictionary but in this case I think they are right!  Whatever you want to call the sensation you have while eating these tarts, I guarantee you will love them!

For those of you who have made mini tarts before, you know that there is often a problem with the pastry dough shrinking in the oven.  I have had this problem before and find this shortbread recipe to be fool-proof, no shrinking at all.  Just make sure that you pop the pan into the freezer for 15 minutes or so to get the dough really cold and firm before you bake the shells.  I had no problem with shrinking at all and the shells are delicious, just like a little shortbread cookie! 

What to fill them with?  You could fill them with any type of pie filling or you could make a pastry cream and top them with fruit.  I have been trying to perfect my lemon curd lately, so that was my first choice for a filling.  I've not been really happy with any of the lemon curd recipes I found.  They were either too sweet, too grainy or not thick enough.  After weeks of playing around with my recipes and adding more egg yolks, more lemon zest, and less sugar.....taaaaa daaaa!  When I finished this last batch I had a taste, and O....M....G!   This lemon curd is truly foodgasmic!  It made me a little weak in the knees.  After several spoonfuls, I stopped and reminded myself to save some for the tart shells.  I topped mine with blueberries, but you could do any fruit or candied lemon rind or even whipped cream.

For my second tartlet filling I made a ganache.  I found a recipe recently on Smitten Kitchen for chocolate tarts that looked fabulous and I had to try the filling.  It did not fail me!  This ganache filling is very easy to make and so rich and delicious!  I warn you that you will want to eat this by the spoonful but only the most experienced chocoholics should try this without supervision.  Talk about weak knees and moaning....this ganache is to die for!

Mini  Tarts

Shortbread Pastry:

1 cup butter, room temperature
1/2 cup powdered sugar
1 teaspoon vanilla
1 1/2 cups flour
3 tablespoons cornstarch
1/4 teaspoon salt

Preheat oven to 325 degrees F.  Spray mini muffin tins with non-stick spray.

In the bowl of your electric mixer, beat the butter and sugar together until smooth. Beat in the vanilla extract. Add the flour, cornstarch and salt and mix just until incorporated. If the shortbread dough is too soft to roll into balls, cover and refrigerate for about 30-60 minutes.

Take 1 tablespoon of shortbread dough and place in the center of each muffin tin. With your fingertips, press the dough onto the bottom and up the sides of the individual muffin tin. Once filled, place the tart pan in the freezer for about 15 minutes so the shortbread can become firm. (This will help to prevent the shortbread from puffing up during baking.)

Bake for approximately 10 minutes or until lightly golden brown. About halfway through the baking time, if the shortbread has puffed up, lightly prick the bottom of each shortbread with the tines of a fork. Once they are fully baked, remove from oven and place on a wire rack to cool. When completely cooled, remove the tarts from the pan.

Recipe adapted from joyofbaking.com

Assemble tarts by spooning or piping lemon curd or chocolate ganache into pastry and topping with fresh berries or whipped cream.

Lemon Curd:

zest of 3 lemons
1 cup fresh lemon juice
1 1/3 cups sugar
4 large eggs + 2 egg yolks
pinch of salt
1 3/4 sticks butter, cut into pieces
1 teaspoon vanilla extract

Whisk together zest, lemon juice, sugar, eggs, and a pinch of salt in a 2-quart heavy saucepan. Add butter all at once and cook over medium heat, whisking constantly, until curd is thick, about 10 minutes. Immediately strain curd into a bowl, then stir in vanilla.  Cover curd and chill until thickened.  Store in the refrigerator.


Chocolate Ganache:

8 ounces (224 grams) bittersweet chocolate, finely chopped
2/3 cup (160 grams) heavy cream
2 large egg yolks, at room temperature
2 tablespoons (1 ounce; 30 grams) unsalted butter, at room temperature
1 teaspoon real vanilla extract

Put the chocolate in a heatproof bowl.  In another bowl, beat 1 tablespoon of the heavy cream with the egg yolks just until the eggs are liquid.

Pour the remaining cream into a saucepan, add the vanilla and bring the cream to a full boil.  Pour the hot cream over the chocolate. Wait for about 30 seconds, then, working with a whisk, gently blend the cream into the chocolate. Still whisking delicately, incorporate the yolks, followed by the butter. Pour the ganachetartlet shells.

If you make these ahead and refrigerate them, pull them out and bring to room temperature for 30 minutes before serving to soften the ganache.

Adapted from SmittenKitchen.com